

A Step-by-Step Guide To Seed Starting Indoors
Have you ever dreamed of having a thriving garden with beautiful flowers or bountiful vegetables? Starting seeds indoors is the perfect way to kickstart your gardening journey and achieve stunning results. In this comprehensive guide, we will take you through every step of the seed starting process, from choosing the right seeds to transplanting healthy seedlings into your garden.
Introduction

Starting your garden from seeds can be an immensely rewarding experience. It allows you to witness the entire life cycle of a plant, from a tiny seed to a flourishing specimen. While many gardeners opt for outdoor sowing, starting seeds indoors provides numerous advantages and opens up possibilities for early planting and a wider variety of plants.
Importance of Indoor Seed Starting
Indoor seed starting plays a crucial role in extending the growing season, particularly in regions with short summers or unpredictable weather patterns. By starting seeds indoors, you gain control over the germination process and can ensure that your seeds receive the optimal conditions necessary for successful growth. This method also allows you to experiment with a wider range of plant varieties that may not be readily available as seedlings at local nurseries.
Benefits of Starting Seeds Indoors
There are several benefits to starting seeds indoors. First and foremost, it gives you a head start on the growing season. By sowing seeds indoors, you can begin the germination process several weeks or even months before the last frost date in your area. This early start enables you to have robust seedlings ready for transplanting when the weather outside is conducive to their survival.
Starting seeds indoors also provides a more controlled environment. You have the power to regulate temperature, humidity, and lighting conditions, ensuring optimal growth for your seedlings. This control is especially advantageous for starting heat-loving plants, such as peppers or tomatoes, in regions with cooler climates.
Furthermore, starting seeds indoors allows you to save money. Purchasing seed packets is often more economical than buying fully grown plants, especially if you plan to cultivate a large garden. Additionally, starting seeds indoors gives you the opportunity to grow unique or heirloom varieties that may not be readily available in nurseries.
Overview of the Step-by-Step Guide
In this comprehensive guide, we will walk you through the entire process of seed starting indoors. We'll cover everything from selecting the right seeds and gathering the necessary supplies to sowing the seeds, taking care of the seedlings, and eventually transplanting them into your garden.
You'll learn how to assess seed viability and choose suitable varieties for indoor cultivation. We'll guide you in gathering all the essential supplies, from seed trays and growing medium to watering tools and light sources. Additionally, we'll provide tips on preparing the growing space, ensuring your seedlings have the ideal environment for germination and growth.
Once the preparations are complete, we'll delve into the actual process of sowing seeds indoors. You'll discover the importance of the right growing medium and learn how to create a suitable seed-starting mix. We'll guide you through sowing seeds at the correct depth and spacing, labeling each tray or container for easy identification, and providing adequate water for successful germination. Furthermore, we'll cover the crucial aspects of maintaining optimal growing conditions, including temperature, humidity, and lighting.
As your seedlings emerge and grow, we'll discuss the necessary care they require. You'll learn proper watering techniques and fertilization methods to promote healthy growth. We'll also explore the important step of transplanting seedlings, guiding you on when to transplant, choosing the right containers, and ensuring a smooth transition for the young plants.
To prepare your seedlings for life in the garden, we'll explain the process of hardening off, gradually acclimatizing them to outdoor conditions. We'll address the challenges of extreme weather and guide you on protecting your seedlings during this transition period. Finally, we'll conclude with valuable insights on choosing the right time for transplanting seedlings into the garden and provide practical tips for a successful transplanting process.
By following the step-by-step guide, you'll gain the knowledge and confidence to start your seeds indoors and nurture them into strong, healthy plants. So, let's dive in and embark on this exciting journey of seed starting indoors!
Getting Started with Seed Starting
Starting seeds indoors requires careful planning and preparation. In this section, we will explore the crucial steps to get you started on the right track.
Choosing the Right Seeds
The first step in successful seed starting is selecting the right seeds for indoor cultivation. When choosing seeds, it's important to consider factors such as the growing conditions available in your indoor space, the length of your growing season, and your personal preferences.
To ensure the best chance of success, assess the viability of your seeds. While most seeds have a good chance of germination, it's wise to perform a simple test to check their viability before investing time and effort into growing them. This can be done by placing a few seeds on a damp paper towel and observing if they sprout within a specified period.
Once you have determined the viability of your seeds, it's time to select suitable varieties for indoor cultivation. Consider plants that thrive in containers or have a shorter growing season, as these are often better suited for indoor growing. Additionally, choose plant varieties that align with your gardening goals, whether you're interested in growing flowers, vegetables, herbs, or a mix of all.
Gathering Necessary Supplies
Before you begin sowing seeds, it's important to gather all the necessary supplies. Having everything on hand will make the process smoother and more efficient. Here are the essential items you will need:
1. Seed Trays or Containers
These provide a suitable space for your seeds to germinate and grow. Choose trays or containers with drainage holes to prevent waterlogging.
2. Growing Medium
A high-quality growing medium is crucial for seed starting. Consider using a commercial seed-starting mix or create your own blend using ingredients such as peat moss, vermiculite, and perlite.
3. Labels and Markers
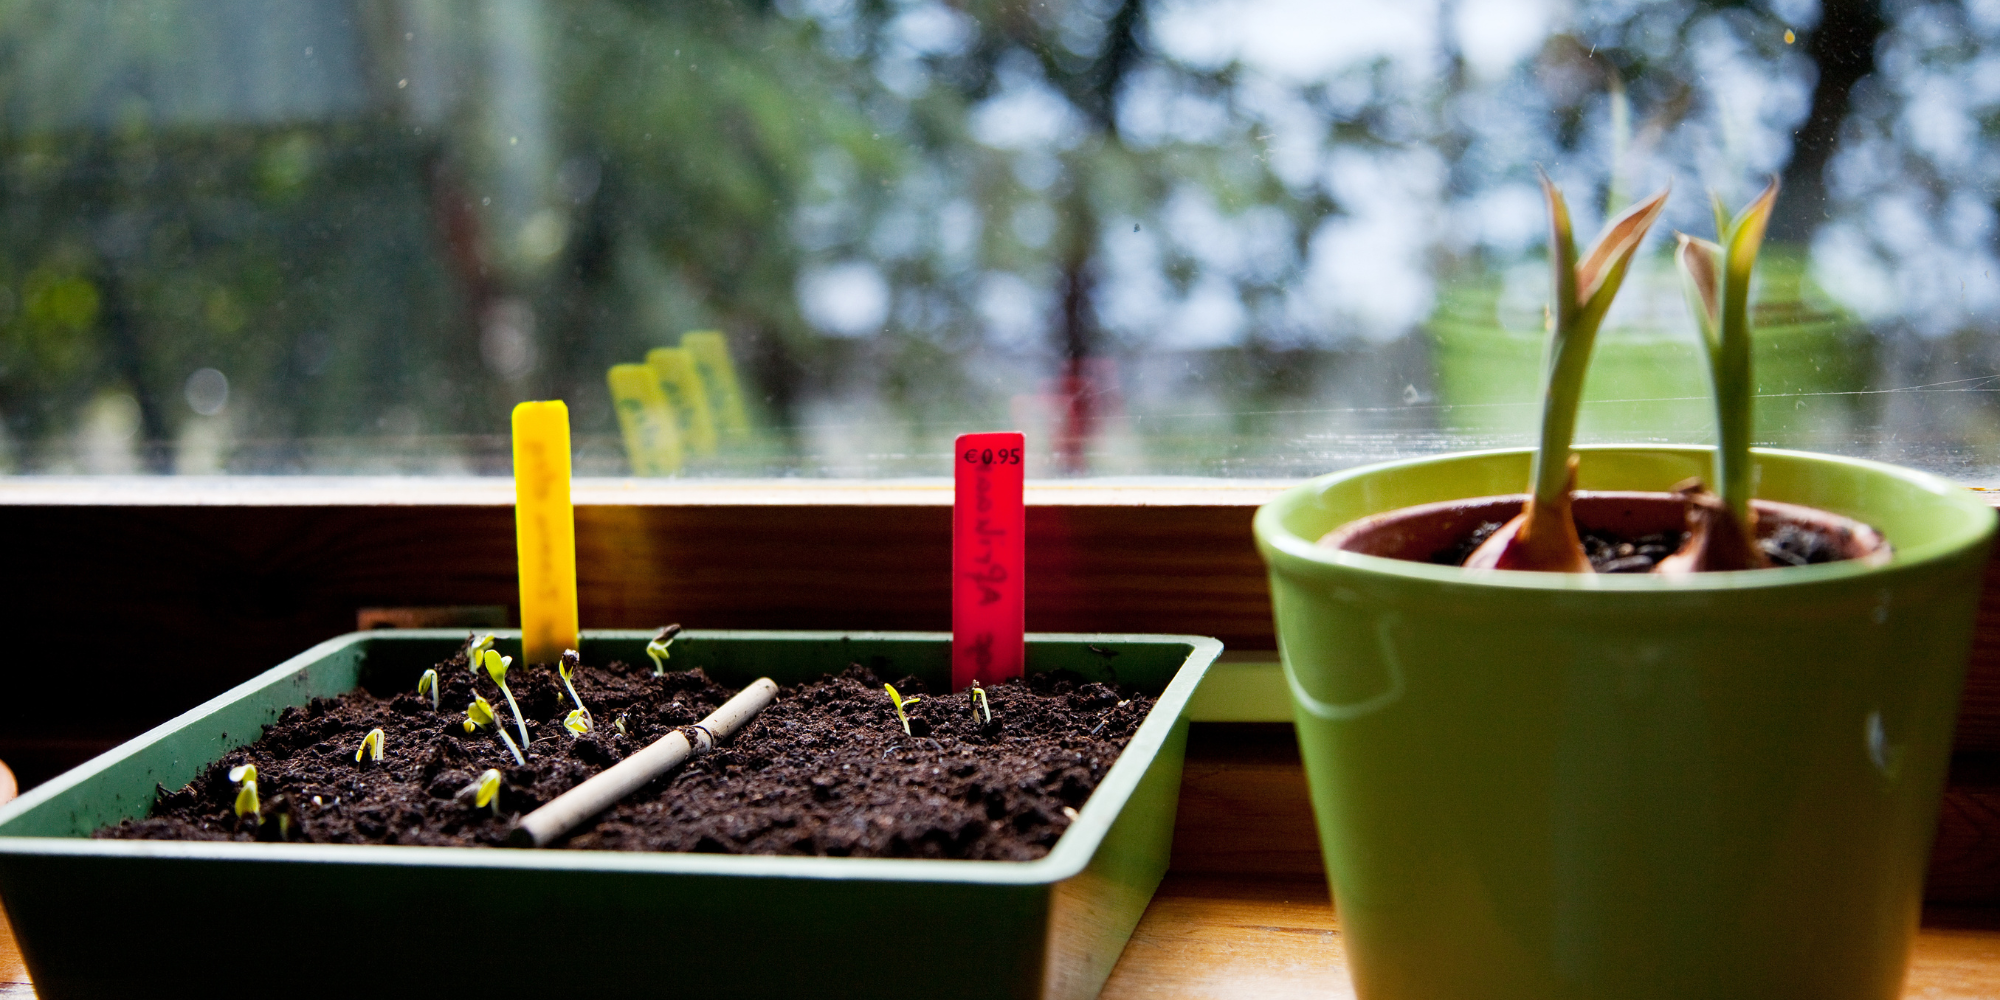
Keeping track of the seeds you sow is essential for organization and identification. Use labels and markers to clearly label each tray or container with the seed variety and sowing date.
4. Watering Tools
Ensure you have watering tools such as a watering can or spray bottle to provide the necessary moisture to your seeds and seedlings without causing damage.
5. Light Sources
Adequate lighting is vital for healthy seedling growth. Depending on your indoor space and natural light availability, you may need to supplement with fluorescent or LED grow lights.
Preparing the Growing Space
Creating the ideal growing space for your seedlings is essential for their success. Choose a dedicated area in your home that receives sufficient light and is easily accessible for regular monitoring and care.
Temperature and humidity control are crucial factors to consider when setting up your growing space. Most seeds require a warm environment to germinate, so maintaining a consistent temperature between 70-75°F (21-24°C) is recommended. Investing in a thermometer and a small space heater or heating mat can help regulate the temperature.
Humidity is equally important, especially during the germination phase. Using a humidity dome or covering your trays with a plastic wrap can help create a moist environment. As the seedlings grow, proper ventilation is essential to prevent damping off and promote healthy growth. Consider using a small fan or opening windows periodically to ensure adequate air circulation.
By carefully selecting seeds, gathering the necessary supplies, and creating an optimal growing space, you are now ready to embark on your seed starting journey. In the next section, we will guide you through the process of sowing seeds indoors, ensuring the best chances of successful germination and growth.
Sowing Seeds Indoors
Now that you have everything prepared, it's time to sow your seeds and give them the best possible start. In this section, we will guide you through the process of sowing seeds indoors, ensuring that you provide the optimal conditions for germination and early growth.
Preparing the Growing Medium
A crucial step in successful seed starting is preparing the right growing medium for your seeds. While you can purchase a commercial seed-starting mix, creating your own blend allows for customization and control over the ingredients. A well-draining and nutrient-rich mix is essential for healthy seedling development.
Start by choosing a base material such as peat moss or coconut coir. These materials provide good moisture retention while allowing excess water to drain away. Next, add perlite or vermiculite to improve aeration and prevent compaction. These additives help create a light and fluffy growing medium that promotes healthy root development.
To create your seed-starting mix, combine the base material with perlite or vermiculite in a ratio of approximately 3:1. Mix thoroughly to ensure an even distribution of ingredients. If desired, you can also add organic matter such as compost or well-rotted manure to enhance the nutrient content of the mix.
Sowing Seeds
Once you have prepared the growing medium, it's time to sow your seeds. Before you begin, refer to the seed packet for specific instructions regarding seed depth and spacing. Different plants have varying requirements, so it's important to follow these guidelines to ensure optimal germination.
Using a small spoon or your fingers, create small indentations or furrows in the growing medium according to the recommended seed depth. Gently place the seeds into the furrows, ensuring they are evenly spaced and not overcrowded. If sowing multiple varieties, label each tray or container with the seed variety and sowing date to keep track of your plants.
After sowing the seeds, cover them lightly with a thin layer of the growing medium or vermiculite. This helps to retain moisture and provides a stable environment for germination. Avoid burying the seeds too deeply, as this can impede their ability to sprout.
Watering Seeds
Watering is a critical aspect of seed starting, as proper moisture levels are essential for seed germination. After sowing the seeds, use a gentle watering method such as a misting spray bottle or a fine watering can to moisten the growing medium. Be careful not to apply too much water, as excessive moisture can lead to rot or fungal diseases.
To maintain consistent moisture levels, it's important to monitor the moisture content of the growing medium regularly. Avoid allowing the medium to dry out completely between waterings, as this can hinder germination. On the other hand, overwatering can lead to damping off or root rot. Aim to keep the growing medium consistently moist but not waterlogged.
As the seeds germinate and the seedlings start to emerge, continue to water them gently, ensuring that the growing medium remains consistently moist. Adjust your watering routine as needed, taking into account factors such as temperature, humidity, and the moisture retention capacity of the growing medium.
By following these steps, you will provide your seeds with the ideal conditions for germination. In the next section, we will discuss the importance of providing the right growing conditions for your seedlings, including temperature, humidity, and lighting.
Providing Ideal Growing Conditions
To ensure the healthy growth and development of your seedlings, it's crucial to provide them with the ideal growing conditions. In this section, we will explore the key factors to consider: temperature, humidity, and lighting.
Temperature
Maintaining the proper temperature is vital for successful seed germination and seedling growth. Most seeds require a warm environment to break dormancy and initiate germination. The optimal temperature range for germination varies depending on the plant species, but generally falls between 70-75°F (21-24°C).
To provide consistent warmth for your seeds, consider using a seedling heat mat or placing the seed trays on top of a warm surface, such as a refrigerator or radiator. This gentle bottom heat helps create the ideal germination conditions and encourages quicker and more uniform sprouting.
Once the seedlings emerge, it's important to maintain a slightly cooler temperature of around 60-70°F (15-21°C). This temperature range promotes healthy growth and prevents the seedlings from becoming leggy or weak. Adjust the temperature in your growing space accordingly to ensure steady growth and development.
Humidity
Proper humidity levels are crucial during the germination phase, as they help ensure the seeds remain adequately hydrated and promote successful sprouting. Most seeds require high humidity to germinate, often between 60-80%. You can create a humid environment by covering the trays or containers with a humidity dome or using a plastic wrap.
As the seedlings grow, gradually reduce the humidity levels to prevent issues such as damping off or fungal diseases. This can be achieved by gradually removing the humidity dome or plastic wrap, allowing for better air circulation and reducing excess moisture. However, it's important to strike a balance between maintaining proper humidity and avoiding excessive moisture, which can lead to fungal issues.
To monitor humidity levels, consider using a hygrometer, a device that measures the moisture content in the air. This will help you adjust humidity levels as needed, ensuring the optimal growing conditions for your seedlings.
Lighting
Light is a critical factor for seedling growth, as it provides the energy needed for photosynthesis. When growing seeds indoors, natural light is often insufficient, especially during the winter months or in areas with limited sunlight. Supplemental lighting, such as fluorescent or LED grow lights, is essential to provide the necessary light intensity and duration.
Position the grow lights approximately 2-4 inches above the seedlings, adjusting the height as the seedlings grow taller. Aim to provide 12-16 hours of light each day to mimic natural daylight. Using a timer can help automate the lighting schedule, ensuring consistent and optimal light exposure for your seedlings.
It's important to note that different plants have varying light requirements. Some may require more intense light, while others can thrive with lower light levels. Research the specific light requirements of the plant varieties you are growing to provide the appropriate light intensity and duration.
By providing the ideal growing conditions of temperature, humidity, and lighting, you will give your seedlings the best chance of healthy growth and development. In the next section, we will explore the crucial steps to take care of your seedlings, including watering, fertilizing, and transplanting.
Taking Care of Seedlings
Once your seedlings have emerged and are on their way to becoming strong plants, they require proper care and attention to ensure their healthy growth. In this section, we will explore essential tasks such as watering, fertilizing, and transplanting.
Watering and Fertilizing
Proper watering is crucial for the well-being of your seedlings. As they grow, their roots develop and expand, requiring a consistent supply of moisture. It's important to strike a balance between keeping the growing medium moist and avoiding overwatering, which can lead to root rot or other issues.
When watering your seedlings, aim for a gentle and even distribution of water. Avoid using a strong stream of water that could dislodge the delicate seedlings or disturb the growing medium. It's best to use a watering can with a fine rose or a misting spray bottle to deliver a gentle shower of water.
Monitor the moisture levels of the growing medium regularly to ensure it remains consistently moist but not saturated. Stick your finger about an inch into the growing medium to check for moisture. If it feels dry at this depth, it's time to water. Adjust your watering frequency based on factors such as temperature, humidity, and the water retention capacity of the growing medium.
In addition to watering, seedlings also require proper nutrition. While the initial seed-starting mix may provide some nutrients, they soon become depleted as the seedlings grow. Introduce a diluted liquid fertilizer, following the manufacturer's instructions, to supply your seedlings with the necessary nutrients. Start fertilizing once the seedlings have developed their first true leaves and continue to fertilize at regular intervals as they grow.
Transplanting Seedlings
As your seedlings continue to grow and develop, they will eventually outgrow their seed trays or containers and need to be transplanted into larger pots or directly into the garden. Transplanting allows the seedlings to have more space for root development and access to the nutrients present in the new growing medium.
Before transplanting, it's important to recognize the signs that indicate your seedlings are ready. Look for well-developed root systems, sturdy stems, and a healthy number of leaves. Transplanting too early can cause stress to the seedlings, while waiting too long can lead to root-bound seedlings or stunted growth.
Choose appropriate containers or pots for transplanting, ensuring they have drainage holes to prevent waterlogging. Fill the containers with a suitable potting mix, making sure it is well-draining and nutrient-rich. Gently remove the seedlings from their original trays or containers, taking care not to damage the delicate roots.
Create a hole in the new growing medium that is deep enough to accommodate the root system of the seedling. Place the seedling in the hole, ensuring that the soil level of the new container matches the soil level of the original container. Gently firm the soil around the seedling, providing support while ensuring good soil-to-root contact.
Managing Pests and Diseases
Seedlings are vulnerable to pests and diseases, so it's essential to be proactive in preventing and managing these issues. Regularly inspect your seedlings for signs of pests, such as aphids, fungus gnats, or spider mites. If you notice any pests, take immediate action to control their population. Organic methods such as introducing beneficial insects or using neem oil can help deter pests.
Seedlings are also susceptible to diseases such as damping off, powdery mildew, or fungal infections. Proper ventilation, avoiding overwatering, and providing adequate spacing between seedlings can help prevent these issues. If you notice any signs of disease, such as wilting or discoloration, take prompt action to prevent its spread.
By providing proper watering, fertilizing, and transplanting, as well as effectively managing pests and diseases, you will ensure the healthy growth and development of your seedlings. In the next section, we will explore the crucial steps of hardening off and transplanting seedlings into the garden, allowing them to thrive in an outdoor environment.
Hardening Off and Transplanting Seedlings
As your seedlings grow stronger and more resilient, it's crucial to gradually expose them to the outdoor environment before transplanting them into your garden. This process, known as hardening off, helps acclimate the seedlings to the changes in temperature, wind, and sunlight. In this section, we will guide you through the steps of hardening off and transplanting your seedlings.
Preparing Seedlings for Outdoor Conditions
Before beginning the hardening off process, ensure that your seedlings are strong and healthy. They should have well-developed stems and leaves, with a vibrant and robust appearance. Avoid starting the hardening off process if your seedlings are weak or struggling, as this may result in their failure to adapt to the outdoor environment.
Start the hardening off process gradually, over the course of 7-10 days. Begin by placing your seedlings outdoors in a sheltered, partially shaded area for a few hours each day. Shield them from direct sunlight and protect them from strong winds. As the days progress, gradually increase the amount of time the seedlings spend outdoors, allowing them to gradually adjust to the outdoor conditions.
Protecting Seedlings from Extreme Weather
During the hardening off process, it's crucial to protect your seedlings from extreme weather conditions that could be detrimental to their health. Keep a close eye on the weather forecast and avoid exposing your seedlings to extremely hot or cold temperatures, heavy rain, or strong winds. If adverse weather is expected, bring the seedlings indoors or provide temporary protection with shade cloth, row covers, or cloches.
Choosing the Right Time for Transplanting
Timing is crucial when it comes to transplanting seedlings into your garden. It's important to consider local frost dates and weather patterns to ensure the best chances of survival for your seedlings. Transplanting too early can expose the plants to potential frost damage, while transplanting too late may result in stunted growth or reduced yields.
Consult a local gardening resource or use online tools to determine the average last frost date in your area. This date serves as a guideline for when it's safe to transplant your seedlings outdoors. Additionally, observe the weather patterns and ensure that the temperatures are consistently favorable for the specific plant varieties you are growing.
Transplanting Seedlings into the Garden
When the time is right, and the weather conditions are favorable, it's time to transplant your seedlings into the garden. Here are the essential steps to follow for successful transplantation:
1. Selecting Appropriate Planting Sites
Choose suitable planting sites in your garden that provide the right amount of sunlight, soil conditions, and space for the specific plant varieties. Consider factors such as companion planting and the plant's growth habits when making your selections.
2. Digging Proper Planting Holes
Dig planting holes that are slightly larger than the root ball of the seedlings. Ensure the holes are deep enough to accommodate the roots without crowding or bending them. Space the seedlings according to the recommended spacing for each plant variety.
3. Caring for Transplanted Seedlings in the Garden
After transplanting, gently firm the soil around the seedlings to provide stability and establish good soil-to-root contact. Water the seedlings thoroughly to settle the soil and help them establish their root systems. Monitor the newly transplanted seedlings closely and provide them with adequate water and protection from pests or diseases.
By following the steps of hardening off and transplanting, you give your seedlings the best chance of thriving in the outdoor environment. Remember to continue providing care and maintenance as your plants grow, ensuring they receive proper watering, fertilization, and protection from pests and diseases.
Conclusion
Congratulations! You have now completed the step-by-step guide to seed starting indoors. Starting seeds indoors offers numerous benefits, from extending the growing season to having a wider variety of plants to cultivate. By following the detailed instructions and tips provided in this guide, you are well-equipped to embark on your seed starting journey and enjoy the rewards of a flourishing garden.
Remember, successful seed starting requires patience, dedication, and consistent care. Monitor your seedlings closely, adjusting growing conditions as needed, and providing the necessary care to ensure their healthy growth. With time and experience, you will become more proficient in starting seeds indoors, allowing you to enjoy a bountiful garden year after year.
So, go ahead and start sowing those seeds! Embrace the joy and satisfaction of nurturing your own plants from the very beginning and witness the amazing transformation as they grow into strong, vibrant specimens. Happy seed starting, and may your garden thrive!
But the journey doesn't end here. As you continue your gardening endeavors, remember to expand your knowledge, experiment with different plant varieties, and adapt your techniques to suit your specific growing conditions. Gardening is a lifelong learning process, and each new season brings new opportunities for growth and discovery.
As you gain experience, you may even consider saving seeds from your own plants to continue the cycle of seed starting and contribute to the preservation of heirloom or rare plant varieties. This not only adds a personal touch to your garden but also helps promote biodiversity and sustainability.
Lastly, don't forget to share your gardening successes and experiences with others. Engage with fellow gardeners, join online communities or local gardening clubs, and participate in seed swaps or plant exchanges. The gardening community is a rich source of inspiration, knowledge, and support.
So, dust off your gardening gloves, grab your seed packets, and get ready to embark on an exciting journey of seed starting indoors. With the comprehensive guide you now have at your disposal, you are well-prepared to nurture your seeds and watch them grow into beautiful, thriving plants. Enjoy the process, embrace the wonders of nature, and may your indoor garden flourish with abundance and beauty!


