

How to Plant Peppermint Seeds: A Guide to Growing Your Own Refreshing Herb
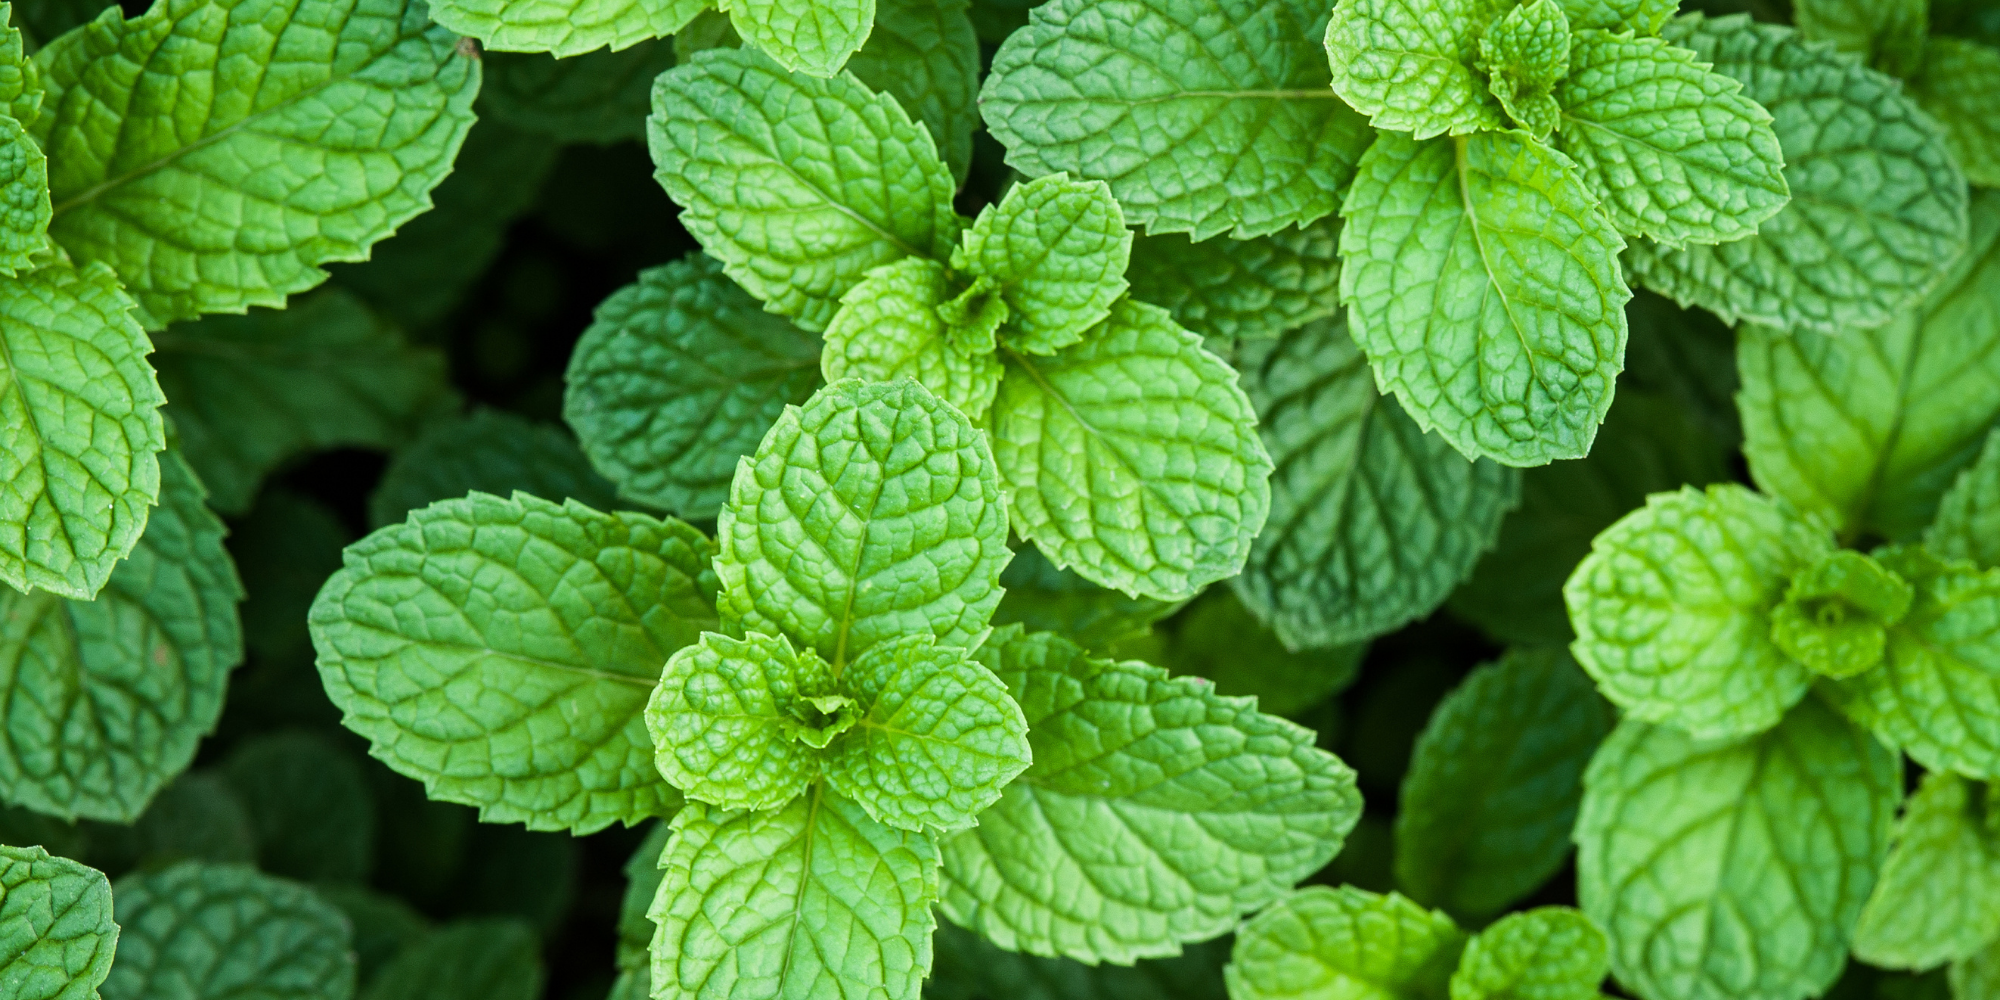
Peppermint, with its vibrant green leaves and invigorating aroma, is not only a delightful addition to drinks and recipes but also a versatile herb with numerous health benefits. And what better way to enjoy a constant supply of fresh peppermint than by growing it yourself? In this comprehensive guide, we will delve into the world of peppermint seed planting and equip you with the knowledge and skills to successfully cultivate this aromatic herb in your garden or indoor space.
Introduction
Welcome to the world of peppermint seed planting! If you've ever dreamed of having a fragrant herb garden or adding a burst of refreshing flavor to your culinary creations, growing peppermint from seeds is an excellent place to start. Cultivating peppermint from its humble beginnings as tiny seeds allows you to witness the entire life cycle of this incredible herb, from germination to full maturity.
Planting peppermint seeds not only brings a sense of fulfillment but also offers numerous benefits. By growing your own peppermint, you have full control over the quality and freshness of the herb. No more relying on store-bought options that may have traveled long distances or been exposed to harmful chemicals. Instead, you can harvest your own vibrant leaves, packed with essential oils and bursting with flavor.
Peppermint is a versatile herb that can be used in various culinary delights, such as teas, desserts, cocktails, and savory dishes. Its invigorating aroma and cooling properties make it a popular ingredient in personal care products like soaps, lotions, and essential oils. Beyond its culinary and aromatic uses, peppermint also offers several health benefits, including digestive support, headache relief, and stress reduction.
Before we dive into the nitty-gritty of peppermint seed planting, it's important to understand the requirements for successful growth. Peppermint thrives in specific conditions, and by providing it with the right environment, you'll set the stage for healthy, robust plants.
In the upcoming sections, we'll cover everything you need to know about preparing for planting, sowing peppermint seeds both indoors and outdoors, caring for the seedlings, and eventually transplanting and growing the mature plants. By the end of this guide, you'll be armed with the knowledge and confidence to successfully cultivate peppermint from seeds, ensuring a steady supply of this aromatic herb for your culinary and wellness needs.
So, let's roll up our sleeves and embark on this exciting journey of peppermint seed planting. Get ready to immerse yourself in the wonders of nature and reap the rewards of your own homegrown peppermint.
Preparing for Planting

Before you dive into planting your peppermint seeds, it's essential to prepare adequately to ensure the best possible start for your plants. This involves selecting the right peppermint seed variety, choosing a suitable location, and gathering all the necessary tools and supplies.
Choosing the Right Peppermint Seed Variety
Peppermint comes in a wide range of varieties, each with its unique characteristics and flavor profiles. When selecting a peppermint seed variety, consider your preferences and how you plan to use the herb. Some popular peppermint varieties include:
1. Black Mitcham
This variety is known for its intense and robust flavor, making it perfect for culinary applications.
2. Chocolate Mint
As the name suggests, this variety offers a delightful chocolatey aroma and taste, adding a unique twist to desserts and beverages.
3. Citrata
Citrata peppermint has a citrusy twist, making it a refreshing choice for summer beverages and salads.
Research different varieties and choose the one that aligns with your taste preferences and intended uses. Keep in mind that peppermint plants tend to hybridize easily, so if you plan to save seeds for future planting, consider growing only one variety to maintain purity.
Selecting a Suitable Location
Peppermint thrives in full sunlight but can tolerate partial shade, so choose a location that receives at least 6 hours of direct sunlight daily. Additionally, ensure that the soil is well-draining to prevent waterlogging, which can lead to root rot.
Soil Requirements for Peppermint Seeds
Peppermint prefers slightly acidic to neutral soil, with a pH range of 6.0 to 7.5. The soil should be fertile, rich in organic matter, and well-draining to support healthy root development. Sandy loam or loamy soil with good drainage properties is ideal for peppermint plants.
If your soil is heavy clay or compacted, consider amending it with organic matter like compost or well-rotted manure to improve its texture and drainage. This will create an optimal growing environment for your peppermint plants.
Sunlight and Temperature Needs
Peppermint plants require ample sunlight to thrive, so choose a location that offers full sun exposure or partial shade. In regions with scorching summers, providing some afternoon shade can help prevent leaf scorching. However, ensure that the plants still receive enough sunlight for optimal growth.
Peppermint is a hardy herb that can tolerate a wide range of temperatures. It thrives in moderate temperatures between 60°F and 70°F (15°C to 21°C). However, it can withstand colder temperatures down to freezing, making it suitable for both indoor and outdoor cultivation.
Gathering Necessary Gardening Tools and Supplies
To ensure a smooth planting process, gather all the necessary tools and supplies beforehand. Here's a list of items you'll need:
1. Quality Peppermint Seeds
Obtain high-quality peppermint seeds from reputable seed suppliers or nurseries. Ensure that the seeds are fresh and viable for optimal germination rates.
2. Potting Soil or Garden Soil
Prepare a well-draining soil mixture suitable for starting seeds. You can either purchase a pre-made potting mix or create your own by combining garden soil, compost, and perlite or vermiculite. This will provide the necessary nutrients and aeration for your seeds to thrive.
3. Containers or Trays for Seed Starting
Choose containers or trays with drainage holes to allow excess water to escape. Peat pots, seed trays, or recycled containers can serve as ideal seed-starting vessels. Make sure they are clean and sterilized to prevent the spread of diseases.
4. Watering Can or Spray Bottle
Provide gentle and consistent moisture to your peppermint seeds using a watering can with a fine rose attachment or a spray bottle. This helps prevent soil disturbance and seed displacement, ensuring even germination and seedling development.
5. Plant Labels or Markers
Use plant labels or markers to identify different peppermint varieties or planting dates. This will help you keep track of your plants and their specific needs as they grow. Labeling also comes in handy when sharing gardening experiences or giving advice to fellow gardeners.
By gathering these essential tools and supplies, you'll be well-prepared to embark on your peppermint seed planting journey. With the right variety, location, and equipment in hand, you're now ready to sow your peppermint seeds and watch them grow into flourishing herb plants.
Planting Peppermint Seeds
Now that you have all your tools and supplies ready, it's time to get your hands dirty and start planting peppermint seeds. There are two primary methods you can choose from: starting seeds indoors or directly sowing them in the garden. Both methods have their advantages, so consider your circumstances and preferences when deciding which approach to take.
Starting Seeds Indoors
Starting peppermint seeds indoors gives you more control over the growing conditions and allows for an earlier start, especially in regions with shorter growing seasons. Here's a step-by-step guide to successfully sow peppermint seeds indoors:
1. Pre-soaking the Peppermint Seeds
Before planting, consider pre-soaking the peppermint seeds for a few hours or overnight. This can help soften the seed coat and promote faster germination. Fill a small container with lukewarm water and place the seeds in it. Allow them to soak for the recommended period, usually 4-6 hours.
2. Preparing the Seed Starting Medium
Fill your seed trays or containers with a well-draining seed starting medium. You can use a pre-made potting mix or create your own by combining equal parts of compost, perlite, and vermiculite. Ensure the medium is moist but not waterlogged.
3. Sowing the Seeds in Containers
Make small indentations in the soil, about 1/4 inch deep, using your finger or a pencil. Space the indentations 1-2 inches apart to provide enough room for seedling growth. Place one or two peppermint seeds in each indentation and cover them lightly with soil. Gently press down on the soil to ensure good seed-to-soil contact.
4. Proper Watering Techniques
Water the containers gently using a watering can or a spray bottle. Aim to keep the soil consistently moist but not overly saturated. Avoid overwatering, as it can lead to fungal diseases and rotting of the seeds. Mist the soil surface regularly to maintain moisture levels.
5. Creating Ideal Germination Conditions
Place the containers in a warm location with plenty of indirect sunlight or under grow lights. Peppermint seeds require consistent warmth for successful germination, so maintain a temperature of around 70°F (21°C). You can use a seedling heat mat to provide bottom heat if needed.
6. Ensuring Germination Success
Peppermint seeds usually germinate within 7-14 days, but it may take longer in some cases. Keep a close eye on the containers and monitor the seedlings' progress. Once the seedlings emerge, provide them with adequate light by placing them near a sunny window or under grow lights. Adjust the light source's height to keep it a few inches above the seedlings to prevent leggy growth.
Direct Sowing in the Garden
If you prefer a more natural approach or have a longer growing season, you can directly sow peppermint seeds in your garden. This method eliminates the need for transplanting seedlings and allows the plants to establish themselves directly in their final growing location. Here's how to sow peppermint seeds directly in the garden:
1. Timing for Outdoor Peppermint Seed Planting
Wait until the danger of frost has passed and the soil temperature reaches around 60°F (15°C) before sowing peppermint seeds directly in the garden. This is usually in late spring or early summer, depending on your location. Check with your local extension office or consult a gardening calendar for specific planting dates in your area.
2. Preparing the Garden Bed
Choose a sunny location in your garden that receives at least 6 hours of direct sunlight daily. Clear the area of any weeds or debris and loosen the soil using a garden fork or tiller. Peppermint plants appreciate well-draining soil, so amend heavy clay soil with organic matter like compost or aged manure to improve its texture and drainage.
3. Planting the Seeds at the Correct Depth
Create shallow furrows in the prepared garden bed, about 1/4 inch deep. Space the furrows 12-18 inches apart to allow enough room for the peppermint plants to spread. Place the peppermint seeds in the furrows, leaving about 2 inches of space between each seed. Cover the seeds with soil and gently firm it down.
4. Watering and Maintaining Moisture Levels
After planting, water the garden bed thoroughly to ensure the soil is moist but not waterlogged. Maintain consistent moisture levels throughout the germination period, which typically takes 7-14 days. Water the area regularly, focusing on keeping the soil evenly moist until the seedlings emerge.
5. Protecting Seeds from Pests and Weeds
To prevent pests from feasting on your peppermint seeds or seedlings, consider covering the planted area with a lightweight floating row cover or a thin layer of horticultural fleece. This will also help retain moisture and create a favorable microclimate for germination. Keep an eye out for any emerging weeds and remove them promptly to prevent competition with the growing peppermint plants.
Whether you choose to start your peppermint seeds indoors or sow them directly in the garden, be patient and provide the necessary care for successful germination. Soon, you'll witness the tiny seedlings emerge, signaling the beginning of your peppermint garden. In the next section, we'll explore how to care for these delicate seedlings to ensure their healthy growth and development.
Caring for Peppermint Seedlings
Congratulations on successfully germinating your peppermint seeds! Now that the seedlings have emerged, it's time to shift your focus to their care and well-being. Proper care during the early stages of growth is crucial for establishing strong and healthy peppermint plants. In this section, we will explore how to provide adequate light and temperature, water the seedlings, nourish them with the right nutrients, and protect them from pests and diseases.
Providing Adequate Light and Temperature
Peppermint seedlings require bright light to thrive and develop into robust plants. Place them in a location where they can receive at least 12 hours of bright, indirect sunlight each day. If natural light is limited or inconsistent, supplement it with artificial grow lights positioned a few inches above the seedlings. Keep the lights on for 14-16 hours per day to mimic the intensity and duration of sunlight.
Maintaining the proper temperature is also crucial for the healthy growth of peppermint seedlings. Aim for a temperature range of 65°F to 75°F (18°C to 24°C) during the day and slightly cooler temperatures of 55°F to 65°F (13°C to 18°C) at night. Avoid exposing the seedlings to extreme temperature fluctuations, as this can stunt their growth or cause stress.
Watering and Maintaining Moisture Levels
Proper watering is essential for the development of strong and healthy peppermint seedlings. Keep the soil consistently moist but not waterlogged, as excessive moisture can lead to root rot and other fungal diseases. Follow these watering guidelines to ensure optimal moisture levels:
1. Water the seedlings gently at the base, using a watering can with a fine rose attachment or a spray bottle. Avoid overhead watering, as this can disturb the soil and displace the delicate seedlings.
2. Check the moisture level of the soil regularly by inserting your finger about an inch into the soil. If it feels dry, it's time to water. If it feels moist, hold off on watering to prevent overwatering.
3. Water the seedlings whenever the top inch of soil feels dry to the touch. Adjust the frequency based on the specific needs of your environment, taking into account factors such as humidity and temperature.
4. Ensure that the containers or garden bed have proper drainage to allow excess water to escape. Standing water can lead to root rot and other moisture-related issues.
Fertilizing and Nourishing the Seedlings
As your peppermint seedlings continue to grow, they will benefit from regular feeding to ensure they receive the necessary nutrients. Here are some key considerations for fertilizing and nourishing your young peppermint plants:
1. Understanding Nutrient Requirements
Peppermint plants have relatively low nutrient requirements. They primarily need nitrogen (N) for healthy leaf growth and essential oil production. Additionally, they benefit from a balanced dose of phosphorus (P) and potassium (K) to support overall plant vigor.
2. Choosing Suitable Fertilizers
Organic fertilizers, such as compost, well-rotted manure, or fish emulsion, are excellent choices for feeding peppermint seedlings. These natural fertilizers provide slow-release nutrients and improve the soil structure.
3. Applying Fertilizers at the Right Time
Wait until the seedlings have developed a few sets of true leaves before applying fertilizer. Dilute the organic fertilizer according to the package instructions and apply it around the base of the seedlings, avoiding direct contact with the leaves. Repeat the application every 4-6 weeks throughout the growing season.
Remember, moderation is key when fertilizing peppermint seedlings. Over-fertilization can lead to excessive leaf growth at the expense of essential oil production. Monitor the growth and health of your seedlings closely and adjust the fertilizer application if necessary.
Managing Pests and Diseases
Peppermint plants are generally resilient against pests and diseases; however, it's still important to remain vigilant and take preventative measures to keep your seedlings healthy. Here are some common pests and diseases that may affect peppermint plants and how to manage them organically:
1. Common Pests
Aphids, spider mites, and mint flea beetles are among the most common pests that can infest peppermint plants. Monitor the seedlings regularly and take action at the first sign of infestation. Use organic pest control methods, such as spraying the plants with a solution of neem oil and water or introducing beneficial insects like ladybugs and lacewings to control pest populations.
2. Recognizing and Treating Diseases
Peppermint plants may be susceptible to fungal diseases, such as powdery mildew or rust. To prevent these diseases, provide adequate air circulation around the plants by spacing them properly and avoiding overhead watering. If signs of disease appear, remove and destroy the affected leaves or plants, and consider using organic fungicides like copper-based sprays as a last resort.
Regularly inspecting your peppermint seedlings for signs of pests or diseases will allow you to address any issues promptly, preventing them from spreading and causing significant damage. Remember to take a proactive and organic approach to pest and disease management.
With proper care, your peppermint seedlings will flourish into healthy, vibrant plants, ready to be transplanted into their permanent growing location. In the next section, we will explore the process of transplanting peppermint seedlings and provide guidance on how to ensure their continued growth and success.
Transplanting and Growing Peppermint Plants
As your peppermint seedlings continue to grow and develop, they will eventually outgrow their containers or the space in which they were initially planted. Transplanting them into their permanent growing location is a crucial step in ensuring their continued growth and success. In this section, we will explore the process of transplanting peppermint seedlings, discuss proper spacing and companion planting, and provide guidance on watering, pruning, and harvesting your peppermint plants.
Transplanting Seedlings into the Garden
Transplanting your peppermint seedlings into the garden allows them to establish their roots in a larger space, providing them with the necessary room to grow and thrive. Follow these steps to ensure a successful transplanting process:
1. Timing and Preparation for Transplanting
Wait until the seedlings have developed a strong root system and are about 4-6 inches tall before transplanting them. Choose a calm, overcast day or transplant in the late afternoon to minimize stress on the seedlings.
2. Digging Proper Planting Holes
Prepare the garden bed by digging holes that are slightly larger than the root ball of each seedling. Space the holes 12-18 inches apart to allow ample room for the peppermint plants to spread. If you're planting multiple rows, maintain a distance of 2-3 feet between the rows.
3. Carefully Removing Seedlings from Containers
Gently tap the bottom of the containers or squeeze the sides to loosen the root ball. Carefully lift the seedlings out, holding them by the leaves or the base of the stem. Avoid pulling or tugging on the fragile stems as this may damage the roots.
4. Planting Seedlings at the Right Depth
Place each seedling in a planting hole, ensuring that the top of the root ball is level with the soil surface. Backfill the hole with soil, gently firming it down around the base of the seedling. Avoid burying the stem, as this can lead to rotting or stem diseases.
Proper Spacing and Companion Planting
Proper spacing is essential for peppermint plants to grow vigorously and prevent overcrowding. Adequate spacing allows for good air circulation, reducing the risk of fungal diseases and encouraging healthy growth. Here are some guidelines for spacing your peppermint plants:
1. In the Garden
Space peppermint plants about 12-18 inches apart to allow them to spread and fill out the growing area. This spacing ensures that each plant receives sufficient nutrients, light, and water.
2. In Containers
If you're growing peppermint in containers, choose a pot that is at least 12 inches in diameter and provides enough depth for the roots to grow. Plant one peppermint plant per pot to prevent overcrowding and competition for resources.
Companion planting can also play a role in the success of your peppermint plants. Some plants, when grown alongside peppermint, can help repel pests or enhance each other's growth. Consider planting peppermint near tomatoes, cabbage, or roses to deter pests like aphids and cabbage worms. However, avoid planting peppermint near other herbs in the mint family, as they may compete for resources and spread uncontrollably.
Watering and Maintaining Moisture Levels
Proper watering is crucial for the overall health and vitality of your peppermint plants. Here are some key considerations for watering and maintaining moisture levels:
1. Watering Frequency
Peppermint plants prefer consistently moist soil. Water the plants deeply whenever the top inch of soil feels dry to the touch. Aim to provide about 1 inch of water per week, either from rainfall or supplemental irrigation.
2. Mulching
Apply a layer of organic mulch around the base of the plants to help retain moisture, suppress weed growth, and regulate soil temperature. Use materials such as straw, wood chips, or compost, and ensure that the mulch is not touching the stems to prevent rotting.
3. Avoid Overwatering
Peppermint plants are susceptible to root rot if subjected to overly saturated soil. To prevent this, ensure that the garden bed or containers have proper drainage, allowing excess water to escape. Always check the moisture levels of the soil before watering.
Pruning and Maintaining Peppermint Plants
Regular pruning helps maintain the vigor and shape of your peppermint plants, prevents them from becoming leggy, and encourages bushy growth. Here are some key pruning tips for peppermint plants:
1. Pinching Back
Pinch off the tips of the stems regularly to encourage branching and bushier growth. This can be done once the plants have reached a height of 4-6 inches. Pinching back the top 1-2 inches of growth will promote lateral growth and create a fuller plant.
2. Harvesting Leaves
As your peppermint plants mature, you can begin harvesting the leaves for culinary or medicinal use. Harvest the leaves by snipping them off with clean, sharp scissors or pruning shears. Leave at least one-third of the plant's foliage intact to ensure its continued growth and health.
Harvesting and Using Peppermint Leaves
Peppermint leaves are best harvested in the morning when the essential oils are most concentrated. Here are some tips for harvesting and utilizing your peppermint leaves:
1. Timing and Methods for Harvesting
Wait until the plants have reached a height of 12-18 inches before harvesting the leaves. Cut the stems just above a leaf node, which is the point where leaves emerge from the stem. This will encourage new growth and ensure a continuous supply of fresh leaves.
2. Drying and Storing Peppermint Leaves
To preserve the flavor and aroma of peppermint leaves, dry them thoroughly before storing. Tie small bunches of 5-10 stems together and hang them upside down in a cool, dry place away from direct sunlight. Once the leaves are completely dry, remove them from the stems and store them in airtight containers in a cool, dark pantry.
3. Utilizing Peppermint Leaves
Peppermint leaves can be used in various culinary creations, such as teas, infused water, cocktails, desserts, and savory dishes. They can also be dried and ground into a fine powder to use as a spice or added to bathwater for a soothing and refreshing experience.
By following these guidelines for transplanting, spacing, watering, pruning, and harvesting, you'll be able to nurture your peppermint plants for optimal growth and flavor. Enjoy the satisfaction of cultivating your own fresh peppermint leaves and explore the endless possibilities of incorporating this versatile herb into your culinary and self-care routines.
Additional Tips for Successful Peppermint Seed Planting
While this guide has provided you with a comprehensive understanding of how to plant peppermint seeds, here are some additional tips to enhance your success and enjoyment:
1. Crop Rotation
Peppermint belongs to the mint family, and it's important to practice crop rotation when planting it in the same garden bed year after year. Avoid planting peppermint in the same spot for more than three consecutive years to prevent the buildup of pests and diseases.
2. Weed Control
Peppermint plants can be vigorous growers, but they do benefit from weed control. Regularly remove weeds from around the plants to reduce competition for nutrients, water, and sunlight. Mulching the garden bed or using landscape fabric can also help suppress weed growth.
3. Harvesting Techniques
When harvesting peppermint leaves, choose the young, tender leaves for the best flavor and aroma. Pinch off the leaves just above a leaf node to encourage new growth and maintain the plant's shape and vigor. Additionally, remember to harvest before the plant flowers to ensure the leaves retain their optimal flavor.
4. Winter Care
In colder climates, peppermint plants may go dormant during the winter months. Before the first frost, cut back the plants to about 2 inches above the soil level. Apply a layer of mulch around the base of the plants to provide insulation and protect the roots from freezing temperatures.
5. Propagation
Once your peppermint plants are established, you can propagate them further by taking stem cuttings. Choose healthy, non-flowering stems and remove the lower leaves. Dip the cut ends in rooting hormone and plant them in a well-draining rooting medium. Keep the cuttings moist and in a warm location until they develop roots.
6. Explore Peppermint Variations
Peppermint is a versatile herb with many cultivars and variations. Consider expanding your peppermint collection by trying different varieties such as apple mint, orange mint, or chocolate mint. Each variety offers its unique aroma and flavor, adding excitement and diversity to your herb garden.
Remember that gardening is a continuous learning experience, and each growing season brings new insights and discoveries. Pay attention to your plants, observe their behavior, and adapt your care routine as needed. Gardening is a journey of patience, curiosity, and exploration, so embrace the process and enjoy the rewards of your efforts.
Conclusion
Congratulations on completing your journey of planting peppermint seeds and nurturing them into thriving herb plants! You have acquired the knowledge and skills to grow peppermint from seeds, from selecting the right variety to transplanting and caring for the seedlings. By following the steps outlined in this guide, you have set yourself up for success in cultivating your own fresh and aromatic peppermint.
Growing peppermint from seeds offers a rewarding experience that goes beyond the joy of having a bountiful harvest. It allows you to connect with nature, appreciate the wonders of plant growth, and enjoy the benefits of having a versatile herb at your fingertips. The process of planting peppermint seeds enables you to have full control over the quality, freshness, and sustainability of your herb garden.
As you continue to care for your peppermint plants, remember to provide them with adequate light, proper watering, and occasional pruning to maintain their health and vigor. Harvest the leaves when they are at their peak flavor and aroma, and explore the many culinary and wellness possibilities that peppermint offers.
Don't forget to share your peppermint-growing journey with fellow gardeners, friends, and family. You can inspire others to embark on their own herbal adventures and spread the joy of cultivating fresh, homegrown peppermint. Experiment with different recipes, create unique herbal blends, and savor the delightful flavors and aromas that this remarkable herb brings to your life.
Now that you possess the knowledge and confidence to plant peppermint seeds, it's time to put it into action. Get your hands in the soil, embrace the wonder of nature, and enjoy the delightful journey of growing your own peppermint. May your garden be filled with the invigorating scent and refreshing taste of this beloved herb.
Happy peppermint seed planting!


